The Cabin

The Cabin

Saturday, April 25, 2015

A New House – Episode 19 – Ditches, Wire, and Pipes… Can You Dig It?


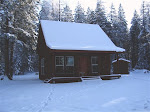
We had a window of good weather and decided to go ahead and dig the trenches for the water and power lines down to the house. The end of the water line terminated somewhere in front of the cabin, and the power source is in the yard past the gazebo.

After evaluating costs for renting a mini excavator, we decided that hiring a local company was the same cost as doing it myself… and it took him only 3-1/2 hrs. We also considered a trencher/ditch witch buy most don’t dig 4’ deep as we needed.

P1020029

…but before we could have him come out and start digging, we had to find the end of the water line. “Let’s see.. if came up from the well about here, and probably turned here to go to the cabin, and …  do you suppose it might have been a good idea to make a drawing of the darned thing last time? huh?  it’s Jason’s fault – he dig the ditch.

 P1020030 - Copy

So we started digging “pilot holes”. 4’ deep pilot holes mind you. Um, not here, not here either.

  P1020031 - Copy

Finally we found a piece of conduit I (forgot) stuck vertically to mark the end of the pipe. Oh, yea, now I remember.

    P1020033 - Copy

Luckily i was smart enough to stub off the water line just past where the electrical conduit crossed over.

    P1020039

So Erin from Dawson Trucking came out with his little rig and started digging.

 P1020040

What a mess. But he did really great work – nice and neat trenches.

 P1020041

Do you suppose we’re deep enough?  I decided to add a gate valve underground where we connected the line, so we can shut that line off when needed. I added a length of 8” diameter pvc pipe to serve as a riser so we can get to the valve later to turn it on or off.

 P1020043

 P1020044

Starting at the cabin end, we then laid our 1-1/4” pvc pipe down the length of the 4’ deep trench carefully gluing each connection. I added a gate valve inside the house.

P1020050

We also teed off at the house and put in a hydrant next to the garage. After testing to make sure we had no leaks (we didn’t), we laid a layer of sand 6” under/over the water pipe to protect it from rocks and give it a “good bed”. Then we carefully back filled the trench leaving us 24” remaining depth for the electrical conduit. (For some reason we failed to take pictures of the water lines in the trench – but trust me, they’re there.)

 P1020042

Erin also had to dig the trench from the outside meter base/panel. That ditch is 2’ deep. Carefully around the gazebo

P1020049

We started by reeling out each conductor and laying them in the trench.

wire

Starting at the house end, we fed the wire up through the vertical piece and “lb”  providing the right angle into the house panel. The wire is (2) conductors of 2/0, (1) of 1/0 for neutral , and (1) of #6 for ground, all copper. 210’ of each. expensive too. ugh!


    P1020048

Then, starting at the meter end, we started feeding the 2” conduit over the four wires all the way to the house end. 210 feet. I guess I make it sound easy, but it wasn’t. Copper wire is heavy.

P1020046

But finally we got the conduit fed all the way to the panel.

    P1020053

And started backfilling the ditch.

P1020052


And backfilling, and grading

 P1020054

… and grading and backfilling …

  P1020056

… and more grading

 P1020057

… until finally we got everything nice and smooth.

 P1020058

… and raked and seeded with grass. Hopefully we will have grass again before the 60th birthday gathering …

P1020059

Meanwhile, we hired a differed excavation guy to refine the excavation work below the house because we weren’t really happy with the way it looked. This also gave us a bunch of good topsoil we needed to help with the grading and fill around the house and the trenches.

 P1020060

Saturday, April 4, 2015

A New House – Episode 18 – The house gets a New Hat


During the past few weeks, while Debbie toiled away at pulling 3/4 of a mile of wire, we decided to pull the trigger and get the roof on the house. Being the frugal people that we are, we had always planned on putting up the roof ourselves. But, between already having multiple tasks on our plate, and not really wanting to tightrope on that roof 30 feet above earth, we went ahead and hired a local contacting company/neighbor/friend to put up the roof for us.

But first, we went ahead and installed most of the facia ourselves to save time and money

facia: stained cedar around the perimeter of the roof lines

P1020004

Carrying a piece of drip flashing.

 P1020005

We also installed most* of the eave/drip flashing. Both the facia and eave flashing have to be in place before the roof can go up.

* Most=everything except the dormers which we couldn’t reach with our ladders.

 P1020006

Then came Brian and David from Bellevue General contractors to start the roof.

We had the roofing materials on site since last fall. (Aging them or something I guess.) The color is called “antique patina” which is same as the cabin – sort of an olive green that turns coppery when the sun hits it are certain angles. The panels are 26 gauge 12” wide snap lock hidden fastener.

 P1020007

Brian up on the roof of the living room. Ladder logistics was a big deal for our roof.

 P1020008

One thing important to getting a roof up well is that the house is built square. Luckily, I guess we did a pretty good job with that.

 P1020009

sometimes I helped by asking – “hey watcha doin?”

  P1020011

Ren did some ladder work as well.

    P1020015

The lake side of the house was the hardest to get done due to the height. I was on the ground fetching and handing panels up to the guys.

 P1020016

They cobbled together a ladder that hooked over the ridge to be able to work on the roof.  The flashing detail around the dormers was fairly complex. Brian did a great job.

  P1020018 P1020019

Brian certainly has more guts than I do!

 P1020020

The cabin side of the house was a little easier to deal with.

  P1020022

Despite all appearances – I did some work too. Aside from handing up the panels, I cut most of the flashing and the additional facia for the dormers. The ridge flashing was a big question mark due to the different slopes of the main part of the roof (10:12 pitch) and the dormer roofs (5:12 pitch). My “plan” was such that the point where the bottom of the ridge flashing hits the two roof angles (9 1/2” below the peak) was the same for each roof. guess what – it was darn close!

  P1020024

The roof is finally done. It took about 5 days. So we hired people for the bottom (foundation) and top (roof) of the house, and we’re filling in between.

 P1020025

One task I accomplished since the last post was to build the deck for the master bathtub. fun project.

 P1020026

Poor Deb continued to toil away at pulling wire. So far, we’ve bought 3,500 feet of 12/2, and 250 feet of each 12/3 and 10/3. We still need to buy 8/3 wire for the range and dryer. We also just bought the main feeder wire – 630’ of 2/0 copper. big stuff around 1/2” in diameter.
 

 P1020027

Debbie also pulled all of the Cat5 network and phone cable.


Next priority: finish the electrical.

Tuesday, March 10, 2015

A New House – Episode 17 – Electrical and Stairs


The past month or so has been primarily occupied by work on electrical wiring and construction of the stairs. (Ok, there was that ONE trip to Kauai, but other than that, we’ve been hard at work inside the house.)

P1010983

The stairs are built from 4”x 15” natural edge “stringers” (the angled beams) that were cut from trees on our property. The stair treads are 4”x12” beams with a natural edge on two edges. These we had made at a local mill.

P1010909

These (above) are going to be the treads. EVERYTHING had to be cleaned up, cut precisely and sanded. Most of the stringers had to be planed as well.

P1010984

It started in the basement.  First I had to build a platform for the first flight of stairs to come up to.

The trick to building stairs is to calculate the rise and run that you need to get to your top level, then divide by the number of stair treads you plan to have. In addition, according to code, the stair treads need to be at least 10” deep and no more than 7-3/4 high. That tread height also needs to be within 3/8” of each other tread. You also have to account for flooring thickness.

stairs2

So I start by measuring .. twice … and snapping a line lengthwise down the length of the beam. Three of the stairway heights were about 63”, so that gave me (+/-) 7” x 9 rises and 10 1/4” x 8 runs. Using a carpenter’s square I measure out a 7” rise and 10 1/4” run, using that long line as a guide. You can sort of see my markings on the beam below. I have to measure the same on both sides. The inside of the beam has 1”x2” blocks tacked on to support each tread. The outside of the treads were marked so I could accurately drill pilot holes for the lag screws.

GEDV0162

Speaking of lag screws, I used 1/2”  x 8” screws and 2” bridge washers. What is a bridge washer, you ask? Here is a quiz. They are called bridge washers because:

A). they are primarily made and imported from Cuba as a “bridge” in import relations.

B) A man named Francoise de Pont invented them (pont=bridge)

C) They are used to bolt bridges together.

D) They look like buttons that held up old fashioned “britches”.

P1020002

The answer?  Who knows… i thought you knew!

P1010993

Starting work on the 1st floor to second floor stairs

GEDV0154

Once again, build the platform first. This is a rustic sawn log look made from 4”x8’ beams and 5” x5” posts.

   GEDV0160

We had to use a chain hoist several times to either move the finished stairs to a different spot, or to raise them to get so hidden bolts.

GEDV0163

In this shot you can see the temporary 1”x2” blocks I used to hold the treads before they were bolted in.

GEDV0163

 GEDV0169

Had to raise this set of stairs about 2’ to be able to get to they four lag screws hidden by a beam.

 GEDV0165

I used my hole hawg with a socket bit to drive the lag screws into the treads.

 GEDV0167

Pretty fancy rigging, eh?

P1010988

Yay!~ no more ladders to get upstairs!!!!

P1010996

finished!

P1020003

Deb covered the treads with heavy construction paper to protect them during work. Tip thanks to Shelley Goodnight!

    P1010985

While all that was going on, Deb was busy busy busy pulling wire throughout the house.

 P1010998

P1010986    So far she has used 2000’  of 12/2 wire, and we just bought another 1000’ roll.  There are also hundred of receptacle boxes of various sizes.

   P1010999

 P1020001  

Below, another thing we accomplished was completing the framing of the fireplace hearth/mantle areas. You can see two sets of posts protruding out that will hold some thick beams as mantles. We need to cover this whole thing with 1/2” concrete backer board before we can mortar river rock onto the face.

P1010997

Next project will be plumbing unless the weather continues to warm, we will probably dig ditches for the water and electrical.

…but then again golf season is starting this week, and we’ve got that camping trip coming up in April …