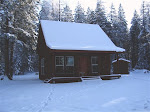

As of today, we have 4 of 18 log courses done. It seems slow, but the cool thing about log buildings is that once the walls are up, you're done ... no siding, no insulation, no interior work.
Before I started the first course, I installed some really straight 2x4's in each corner and in a few other spots, and made them perfectly plumb, so as we put up the logs, (hopefully) we keep the walls plumb, straight and level. We'll see.
Before a new course is put down, I lay down some 1/2" thick foam tape and a bead of caulk along the length of the top of the previous log.

We carefully place the new log on top. The logs are then screwed down using 9" "Olylog" screws every 30" along the log, which I drive in and counter sink with a hole hawg drill motor.

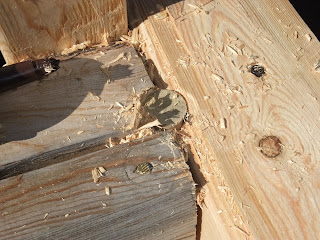
Once the logs are screwed down solid, the corners are pegged using 1" round x 5" long dowels embedded in caulk. This creates a spline of sorts in each corner and in butt joints to keep the logs from twisting. It also seals the corners where one log butts up to another, so water, air and bugs won't come inside... as much. In a traditional round log home, you typically have interlocking notched corners, so you don't have these butt joints to seal.

We also cut down a dead standing tamarack tree and dragged the lower 30' to the shop. 26' of that log will be used as the porch roof header/beam supported with (4) log posts. Deb is going to debark it beginning this weekend.

We also cut down a dead standing tamarack tree and dragged the lower 30' to the shop. 26' of that log will be used as the porch roof header/beam supported with (4) log posts. Deb is going to debark it beginning this weekend.
No comments:
Post a Comment