The Cabin

The Cabin

Saturday, October 7, 2017

A New House - Episode 32 - The Other Side

... Or the back side, The lake side. The-side-we-dreaded-to-finish-because-those-dormers-were-so darned-high side. You know, THAT side. Now that the siding is completed on 3/4ths of the house, our goal this year was to complete work on the... EAST side.


But that meant getting up to those damn dormers we've been avoiding. Like a mile high or something! We talked about renting lifts, scaffolding, etc. to get up there with some kind of ladder contraption. Ugh!


Above, the original design was for a dropped deck (of undetermined size) to extend across the back, then up two steps to a 12' catwalk deck with a porch roof outside Kyle's outside door. 

As we pondered the design, however, we realized that a deck exposed to the brutal force of the snow falling from 15' up .. would be bad - real bad. 


So we changed our design to have a porch roof the full length of a catwalk deck. 


and then the real work begins ...


starting with drilling holes in concrete-like clay hardpan with a skidsteer. It sorta worked ok-ish. 15 12" round holes for sonotube deck foundations. Then I poured the footings. 


After we built the deck in front of the living room area, the next step was to put in 10" log posts to support not only the deck, but the upper porch roof as well. 


All fancy braced and all.


The posts to support the porch roof headers were each wallowed out into saddles to support log header beams. All I can say id that the Arbortech "turboplane" is the best tool I've ever owned. Amazing.


Friend Mac McKinney came over with his forklift and hoisted the beams into the saddles.


Then the porch roof was framed and sheeted. 


At this point we realized how genius (and free) it would be to slap together a frame platform sitting on top of the porch roof to be able to access the dormers. a ladder sat on the roof support by the platform. It worked great! 


Deb had to kill the wasp nests before we attempted siding work. The fancy white cloth thingies in her hair is bounce drier sheets - supposedly to ward off wasps.


I would cut the panels to side and bring them up to Deb and sheet nail em in


Yay - the dormers are done!


Meanwhile - back at the ranch Deb did some rock work while I did siding.


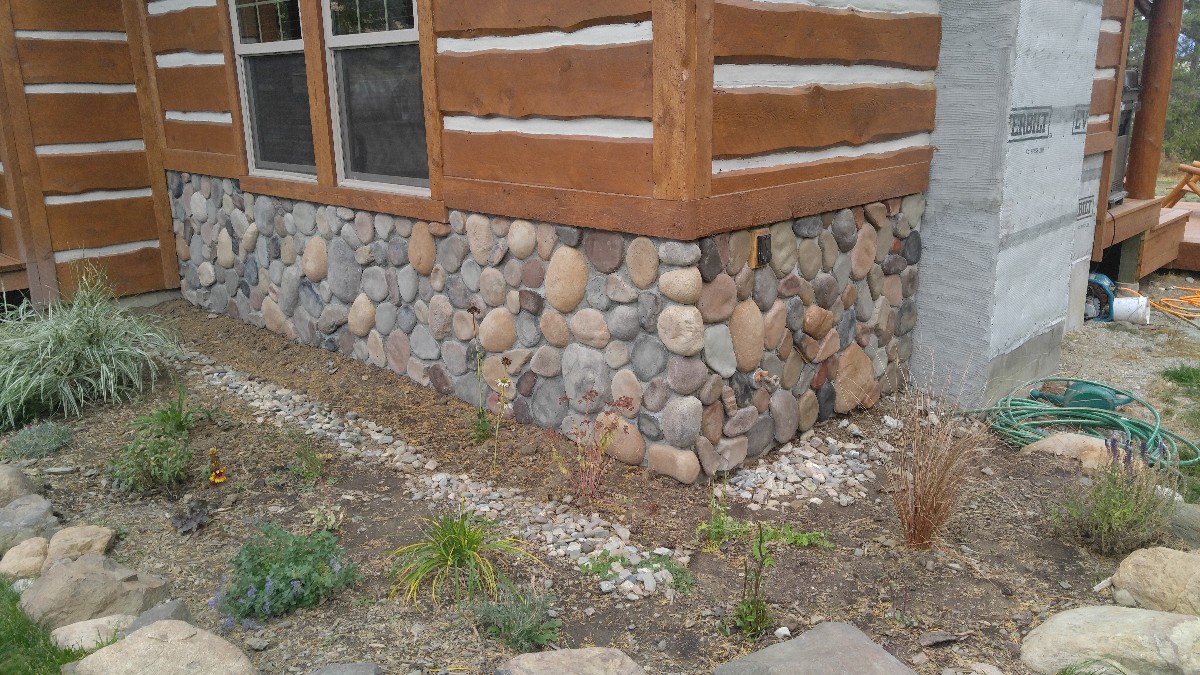
The log siding is up. We just need to buy some more chinking for next summer. We also need to work on railings, stairs and some deck benches and planters  - next year.


The area in front of the basement walk out is just gravel for now. Next summer we hope to do some kind of paver patio, a shelter for the BBQs, and more landscaping. 


a gorgeous rainbow came one day

Tuesday, May 23, 2017

A New House - Episode 31 - Siding and other stuff

 We have been pretty busy since the sun has finally shown itself, working on the log siding. With the exception of the front porch steps, which are still temporary, the front is done and the left side is nearly done (waiting for an order of chinking) It feels good to get the house sided and we are pretty happy with the look. 


We really think that this log siding approach is a win win for us, giving us all of the benefits of a stick-framed home (good insulation, but no bugs or leaks), with the look of a log home. The log slabs are 2" "slices" from the tree, with the natural edges in tact. 


After picking out the best log for the specific location I have to clean them up, sand them a bit, apply a water based pre-stain, then two coats of log stain made by Perma-chink. The slabs are 16' long and anywhere from 8" to 15" wide, so it takes both of us to put them up (duh)


The slabs are screwed into the wall's studs every 32" or so. 


After the logs are up, we cut and insert a 3/4" thick foam backer strip into the gaps. This is important to allow the chinking to float - attached to the upper and lower log but still able to give and stretch. We then squirt in the chinking - which is like a sandy caulk.We buy the chinking in 5 gal buckets, and suck it up into a large caulking gun, then repeat, repeat, repeat. Deb follows me and smooths it out.


This is our pile of log slabs


Deb hauled boulders and made some flower bed in front of the house.


When it is raining, we are forced to do work inside.This is the finished master bathroom vanity with Debs fancy mirror rockwork.


The master shower is finally done. A composite shower pan, tiled walls and more fancy pebble rock.


The master "powder room". Everybody needs a closet for you golf clothes, right?


I made this nifty industrial grade toilet paper holder. 

Next steps: more siding, scratch coat prep for river rock around base of the living room and chimney chase, dig holes for the rear deck and start deck construction

Tuesday, March 28, 2017

A New House - Episode 30 - Winter Work

Our last post on the new house was last October, so it's been a while. The big push was initially to get the house more "livable" and prep for the kids visiting over Christmas and having other friends and family over to visit. 


Deb did a sweet job decorating for Christmas


The dining room is all set up including that lamp I made in the corner and temporary railing around the stairs. 


The free-form floor lamp.


Kyle's room is essentially done. I just need to make some closet doors. His door to the "deck" is locked...since no deck yet exists.


We built and painted a cabinet in the foyer area. Other items completed were mostly stuff like hanging interior doors and finishing trim.


Trim is in around the living rooms windows and doors

And log trim around the entry to the living room. At this point, the main floor is "done". Yay!

Then we moved upstairs to work on the master bathroom


Starting with installation of the heated floors


This self-leveling floor compound is pretty cool - but make sure you seal all joints to prevent water from dripping to the floor below. 


The Deb started work on the quartzsite floor.


She infilled the grouted areas with pebble rock which we think looks pretty cool. 


... and rock around the tub


and the remodel work has already begun... i.e. "tweaking". Can you tell what is different in the picture from before?


Eventually I got around to starting the shower. 
Everything is covered with 1/2" Hardiebacker, then all joints are taped and mudded with thinset.


Then painted with two coats of Redgard sealer.


Then the tile. We chose a grey/brownish weathered wood-look plank tile. 


Two of 3 walls are planked. 


.. and Deb doing some fancy wall art around the vanity mirrors


free-form cut mirrors surrounded by free-form pebble rock. We saw this neato style while visiting friends Gary and Shelley at their home in Carefree, AZ. 


 All finished and ready for the vanity. 

..i know this look ins't for everyone, but we like it!


...till next time