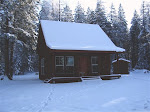
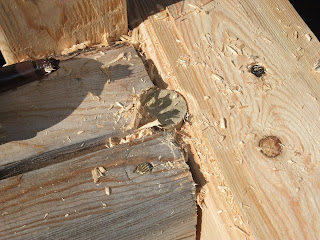
The Cabin

The Cabin

Wednesday, October 12, 2011

Log Cabin Wood Shop - Log Walls Completed

Today was an exceptionally good day (they're all good, or course) as I finished the log walls. 18 log
courses using about 100 logs. I am looking forward to starting the roof.

Next step for the roof is to build the ridge beam and post structure. We also need to get the log porch beams and posts done and up.


You'll see that the logs extend on the gable ends longer than the normal amount. This is to accommodate an 18" roof overhang. The ridge beam will extend the same amount.


Those last few top lops were quite a stretch for the tractor, even with the forks. But it really helped get the logs high enough, so all I had to do was lift the ends into place.


We ordered some log stain (Permachink Lifeline Dark Natural), and we hope
the weather will continue to be nice enough to get the logs cleaned, bleached, caulked, and stained before winter.

Fall is definitely here, with cooler days and nights, but for the most part it has been clear and nice. We plan to get a little more golf in before winter, so tomorrow is a day off. We also are planning a trip up to Colville to Webley Lumber to get the rafters, 2x6 tongue and groove flooring, and other lumber to frame in the roof.


Tuesday, October 4, 2011

Log Cabin Wood Shop - Taking Shape

The shop is progressing nicely. We are now on the 11th course of logs (of 18) and the windows have begun. We will have one 3'x3' window on each side. It is getting to the point where lifting the logs into place is a bit difficult, so we'll probably start using the tractor to lift them adjacent to the wall. Why fight gravity if you don't have to.


These house logs were pretty inexpensive (relatively) so I expected to have some that were bowed, warped or twisted ... and I was not "disappointed", although so far most are ok. I did have a problem with a hump along the back wall that I dealt with using a hand planer. At the
peak, it was 3/4" too high.

Meanwhile, Deb continues to debark logs. We took down a second standing dead tamarack tree, which turned out to be too big in diameter and too curvy. We may get one or two of the posts at the top end, then save the remaining log for the house. She used a spud and a draw knife to do the debarking.

Friday, September 30, 2011

Log Cabin Wood Shop - Walls Begin

As of today, we have 4 of 18 log courses done. It seems slow, but the cool thing about log buildings is that once the walls are up, you're done ... no siding, no insulation, no interior work.

Before I started the first course, I installed some really straight 2x4's in each corner and in a few other spots, and made them perfectly plumb, so as we put up the logs, (hopefully) we keep the walls plumb, straight and level. We'll see.


Before a new course is put down, I lay down some 1/2" thick foam tape and a bead of caulk along the length of the top of the previous log.


We carefully place the new log on top. The logs are then screwed down using 9" "Olylog" screws every 30" along the log, which I drive in and counter sink with a hole hawg drill motor.


Once the logs are screwed down solid, the corners are pegged using 1" round x 5" long dowels embedded in caulk. This creates a spline of sorts in each corner and in butt joints to keep the logs from twisting. It also seals the corners where one log butts up to another, so water, air and bugs won't come inside... as much. In a traditional round log home, you typically have interlocking notched corners, so you don't have these butt joints to seal.


We also cut down a dead standing tamarack tree and dragged the lower 30' to the shop. 26' of that log will be used as the porch roof header/beam supported with (4) log posts. Deb is going to debark it beginning this weekend.


Saturday, September 24, 2011

Log Cabin Wood Shop - Foundation Complete


Today we finished the foundation frame for the shop. It was pretty dusty work, wallowing around in the trenches setting posts and putting in bracing, but it's done. I'm calling this design the "integrated post and beam" foundation because it takes advantage of the 6x6 cross beams (D logs) to help strengthen the overall base.


We (i.e., Debbie) still have some grading work to do around the perimeter, which should get done tomorrow. We also need to cut down a couple of standing dead tamarack (larch) trees to use for the porch posts and header. Tamarack trees tend to be long and straight with less taper than fir or pine. Deb said that she'd debark them, while I start work on the walls.

Tomorrow I need to peg the corners and joints for the first layer already done and built some plumb guides to I keep the walls plumb as they get higher. (more on this later)


This is a draft of what the shop layout will look like. Is 16x24 big enough? Heck no, but it's bigger than my last shop.

Tuesday, September 20, 2011

Log Cabin Wood Shop - Foundation


The foundation for the wood shop is about 1/2 done, after 3 days work. (We took the last two days off and visited Spokane and played some golf in Chewelah).

We have 13 of the 29 posts set, creating the basic 16' x 24' frame of the base.These posts are 6x6 treated with a "retention level" of .60 pcf. This refers to the amount of preservative that remains in the wood after the treatment process is complete. It is measured on a weight basis and is typically expressed as pounds of preservative per cubic foot (pcf) of wood. The frame is now squared and level, so the remaining 16 posts are relatively easy to install. Even though this is dusty ditch work, it is fun and rewarding to see things come together.

The base foundation structure is built like a wooden roller coaster - with everything tied together and braced at all angles for shear strength. The first layer of logs are part of the frame structure - anchored to the posts and braced.
Since the posts are set 36" deep, once back filled, the earth will provide even more shear strength.

I expect that we'll be finished with the frame in a few more days and then we can back fill them. then the real fun begins - setting up the log walls. Here are the 16' D logs stacked are ready for set up.


Thursday, September 15, 2011

The Log Cabin Wood Shop - Genesis


Debbie and I have embarked upon another project which is a Log Cabin Wood Shop. It will be 24' x 16' with a 5' deep porch along the long side (similar to the look of the cabin). The roof will have a 6/12 pitch on the main part and 3/12 on the porch. It will have two windows and one 4' wide front door that I plan to make, and I'll install a small wood stove inside.

I had already purchased 130 6x6x16' 'D" logs from a local supplier at a bargain price and today we dug out the foundation ditches with a rented excavator. I also have the 9" log screws and sealing tape to got between the log courses.

The logs will be stacked in the "butt and pass" method.The foundation will be built using 6x6 treated posts every 4 feet on piers set about 3' deep. The log walls will sit on the top of the 6x6 posts. the foundation walls will be skirted with 2x6 and 2x8 treated wood.


Once done I'll be able to move all of my wood working power and hand tools, as well as benches inside so I can
start turning bowls and doing other projects again. I am looking forward to having a shop again so I can work in a heated space. We should be able to get it "framed in" with at least tar paper on the roof before winter really sets in. After all, we still need to play golf and have fun too!

Sunday, July 17, 2011

How (most) Ultra-Light Travel Trailers are made


The main frame/chassis/undercarriage is brought in at one end of the factory.
The floor assembly is based on an aluminum frame enclosing foam insulation, with 5/8” plywood screwed to the frame and linoleum laminated on top. The chassis is then flipped upside down, and the axles, wheels, and underside wiring, plumbing, and heating ducts are installed on the bottom side of the chassis. In some models extra insulation and heating ducts are added to aide in winter camping. This mess is then covered with a layer of corrugated plastic material which encloses the bottom side, keep out some cold and helping
to reduce wind drag.


The trailer is then flipped back upright for the construction phase. At this point the interior walls, cabinets, framing are installed onto the floor. These elements are screwed down to the
plywood floor. Next, kitchen and bath components are installed into the trailer and plumbed in. Wiring to the cabinets and lighting, and plumbing is completed to the sinks, shower and toilet.


Once the interior items are installed, the walls can be erected onto the floor. The front, rear and side walls are built separately, based on a framing made from 2” square tubular aluminum material.


Rigid foam insulation is cut to fit inside the frame and layers of fiberglass is laminated to the outside of the frame. Luan plywood and a layer of laminate material is laminated to the inside, completing a one-piece wall assembly. The wall is then lifted into place and screwed down to the floor. The other three walls are built and attached in the same manner.


An aluminum framed roof assembly is built similarly to the walls, but in many cases, could have either a flat roof or arched steel trusses to create curved roof. The roof is covered with EPDM rubber which us glued down to make itwaterproof. Roof vents and an air conditioner is added and screwed down and sealed.


Slide outs are assembled separately and mounted to the trailer.
Doors and windows are installed and sealed.
Graphics are placed on the walls.


Meanwhile, people are com
pleting the interior, mounting and wiring the electrical panel, lighting, heating, microwave, oven, televisions, mirrors, drawers, cushions, and carpets.
Once the trailer is complete, a quality assurance inspector goes over the inside and out, marking anything that isn't correct with pieces of red tape. Cabinets, marks, scratches, etc. Then someone goes back in and corrects the defects.