The Cabin
Sunday, November 27, 2011
Log Cabin Wood Shop - Roof Completed ... Really!
Saturday, November 19, 2011
Log Cabin Wood Shop - Snow, Door and Stove
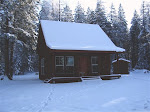
The good news is that we received the metal roofing for the shop ... the bad news is that we now have 9" of snow on the ground which is likely to stick around until March. So, putting up roofing is not likely to happen.
We installed the wood stove and fired it up. This is a old Washington Stove Works "trash burner" that we bought around 10 years ago, originally
intended to be put in the big cabin. It is kitchen cabinet size, so I suspect it originally went in a kitchen along side cabinets. The upper part is the fire box which is really small, so it only handled kindling size wood or small logs around 3" diameter and 15' long. It has a a cook top, a built in damper and a removable soot box.
The past two days were spend building and installing the front door. It is made from 2x6 tongue and groove pine (same as the floor). As mentioned before, it is made as a dutch door, but I haven't cut it half yet. I still need to put in weather stripping and a door knob. Deb was disappointed that the cool cross supports are on the inside, rather than outside, so I may add more stuff on the outside. I bought some 15" gate hinges on ebay, which work really well.
Tomorrow, I'll probably frame in the windows and maybe start in on finishing electrical.
Wednesday, November 16, 2011
Log Cabin Wood Shop - Inside Work
Now that the roof is done* and water tight, we had a chance to start working indoors this week. None too soon, because we have had snow a couple of days this week. So, we installed the electrical wiring, layed down a visqueen vapor barrier in the crawl space, insulated the floor, and installed and stained the 2x6 flooring. Then we insulated the ceiling and gable end walls. And installed the wood stove triple wall pipe and mounts.
You'd think that now we'd have a warm cozy cabin, wouldn't you? Well it is certainly easier to get warmer (from last night's low of 9 degrees), but we still have tarp for a front door and clear plastic covering the windows, so keeping the heat in is a challenge even with insulation.
So tomorrow is door day. I plan to make a nifty

dutch door (just like Dick Proenneke's Alaska cabin less wooden hinges). For those of you not familiar with Dick's story, I highly recommend you read "One Man's Wilderness, An Alaskan Odyssey", quite inspiring.
* Roof is covered with tar paper
awaiting arrival of the metal roofing material
Tuesday, November 8, 2011
Log Cabin Wood Shop - Log Porch
Next task is to lay the 1x8 T&G boards (pre-stained by Debbie) on top of the rafters, put up the facias, and cover it with tar paper. Then I start on electrical until the metal roof arrives.
Thursday, November 3, 2011
Log Cabin Wood Shop - Weatherproof Roof roof roof
The perimeter overhangs are covered with 1x6 pre-stained boards, so we won't have to stain those nasty soffits from a ladder getting a kink in our necks.


Deb then covered the windows and doors with plastic to further keep rain and snow from blowing in. We have the windows and will install them once we get the porch done. That door looks pretty slick, eh?
Today I started on the porch logs.
Saturday, October 29, 2011
Log Cabin Wood Shop - Roof Frame Completed
There are two doubled 2x8 cross beams spanning the width of the shop, on which I have 5x5 posts sitting to help support the ridge.
Today was plane and stain day. I needed to plane about 50 1x6's down to close to 1/2" to be used for the exposed soffits. The rest of the roof not seen will be 1/2' OSB. I also had to plane (10) 6 1/2' house logs removing the tongue and groove, to be used for the porch rafters.
We also finished cutting the last porch beam support log posts, 4 total about 10" diameter. Deb spent the last several days removing their bark and using the draw knife to get them down to the wood for a "skip planed" look.
Debbie also did a ton of staining as today may be the last "warm" day of the season (above 50 degrees). This included the porch rafters, all of the soffit material and the facias. So everything will have one coat of stain going into winter.
Next job is to put in the front deck joists and flooring in preparation for the log posts and beam.
Friday, October 21, 2011
Log Cabin Wood Shop - Roof Begins
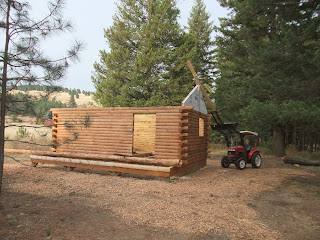
Today we set the gable ends (triangle pieces on the end of the building) on top of the log walls. To do this I erected a "boom" onto the tractor's loader. Deb guided the gable ends into place and I gently set them on top. I pre-built the gables in the garage including OSB (oriented strand board) sheathing and the Tyvek house wrap covering the OSB. There is a notch at the top of each to hold the ridge beam. They were pretty heavy, so I wasn't exactly sure that the boom arrangement would actually work... but it did great!
Up until today, we've been busy bleaching, trimming, caulking and staining the logs. The bleach/water mixture (1:3) did wonders with the sun-darkened logs. I included a "before" picture below to show the difference.
So now, we have one coat of stain on the outside (using Permachink's Lifeline "Dark Natural" stain), and one on the inside using Behr Log stain. Deb did most of the staining. We caulked before staining using a latex/silicone combo caulk which matched the stain really well. Now, aside from missing the roof, the cabin is winter ready. we want to get one more coat of stain on the outside before it's too cold to stain.
Next job will be to put up the ridge beam and start setting rafters into place.
Subscribe to:
Posts (Atom)